


Please note that each time you open a training expedition map, it will be a different map. This training expedition guide is meant to provide you with some basic knowledge so you can go on and practice using the basic pointers provided here. I have completed 3 of 5 training expedition maps to help you which you can find below.
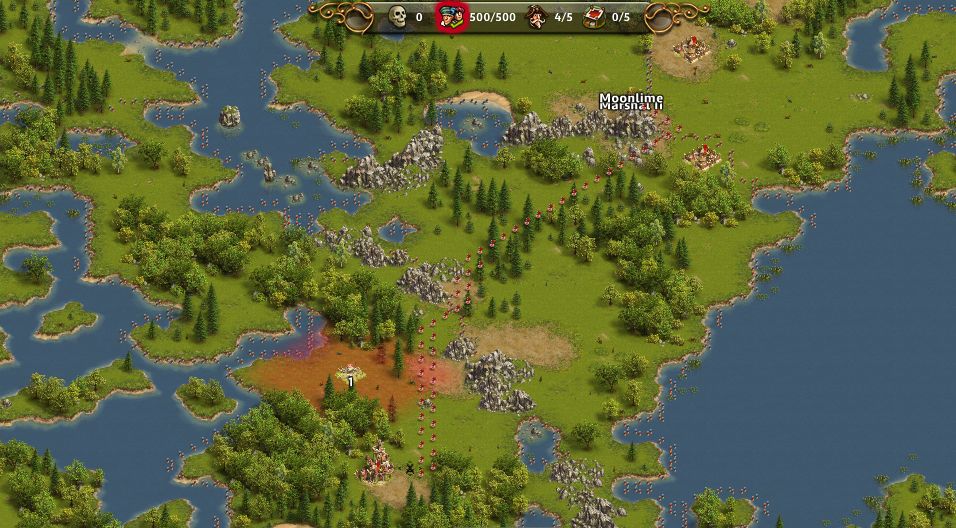
Here's Map 1 of 5:
1. Marshal Placement: Place your Marshal as shown so you can attack the Map Boss. You'll notice you have 1 camp blocking your path.
Camp 1 with 40 Melee. Send 40 Archers.
Using the PVP Combat Principle Melee beats Cavalry, Cavalry beats Archers, Archers beat Melee, you want to ensure your attacks are always giving you the best advantage so in this case, send 40 Archers to fight the camp blocking the path to the Map Boss.
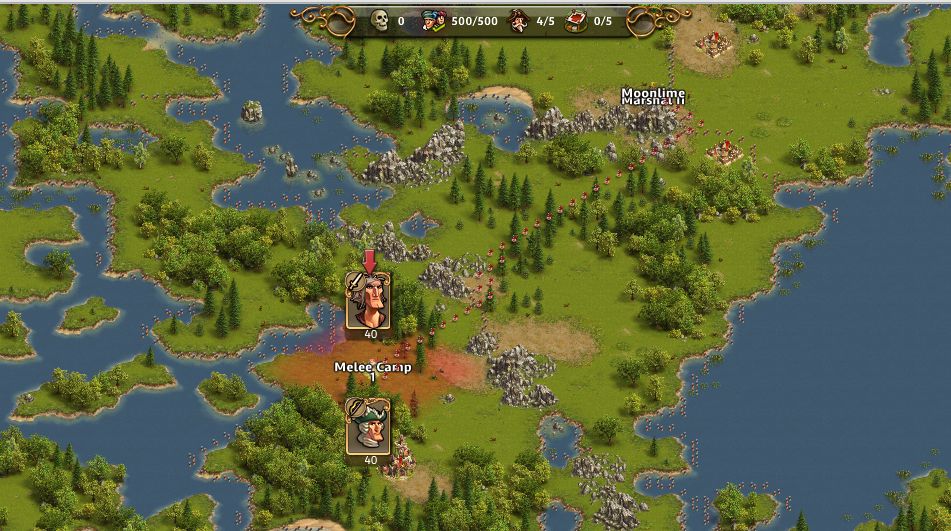
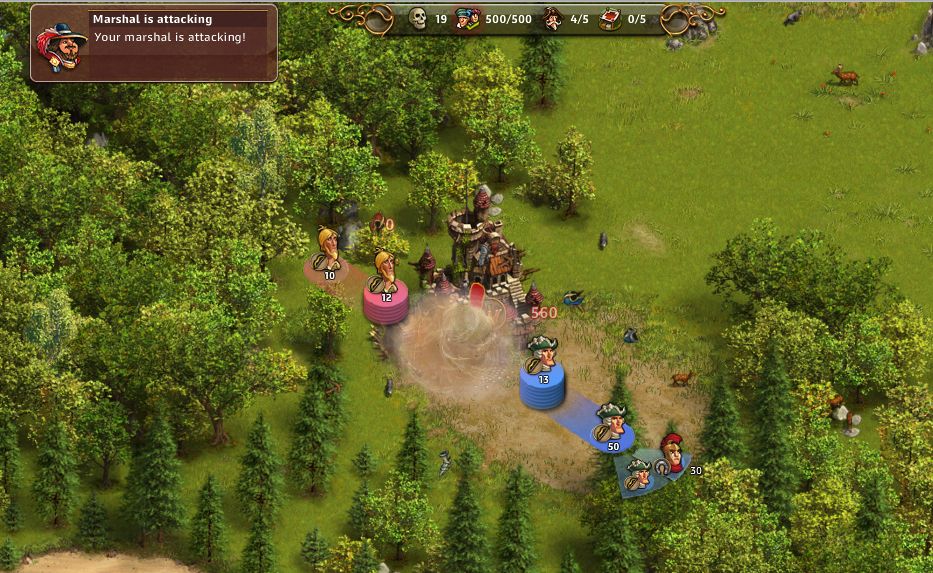
Camp 2 – Map Boss (Goal). Send 30 Cavalries and 70 Archers.
After you defeat camp 1, attack the Map Boss with 30 Bandit Bowmen, 30 Bandit Recruit and 1 Wild Mary Boss.
Again, using the PVP Combat Principle Melee beats Cavalry, Cavalry beats Archers, Archers beat Melee, you want to ensure your attacks are always giving you the best advantage so in this case, Cavalry beats Archers or Ranged units so send 30 Cavalries to fight the 30 Bandit Bowmen.
Then as Archers beat Melees, send 30 Archers to beat the 30 Bandit Recruits + additional 40 Archers to fight the Wild Mary Boss. As soon as the Cavalries beat the Archers switch your attack units to Archers so that you can save the rest of the Cavalries. In doing so, you'll need to be quick. Once you start to lose as evidenced by the red numbers over your troops, you won't be able to switch until those troops lose completely.
You may also experiment with blocks by following the PVP Step-by-Step Tutorial by Zami. You may be able to improve the PVP troop losses by using the PVP Calculator shown on Zami's step-by-step tutorial video.
This guide uses the PVP's intended rock, paper scissors system. If you want to try out an infantry only approach, you might want to read Zami's post on that first so you are prepared and aware of any potential risks. The idea is that you try it out and have fun!
Map 2 of 5: *Please note that there's another very similar training expedition map. Use the techniques here to conquer it.
Map 3 of 5: (also different):
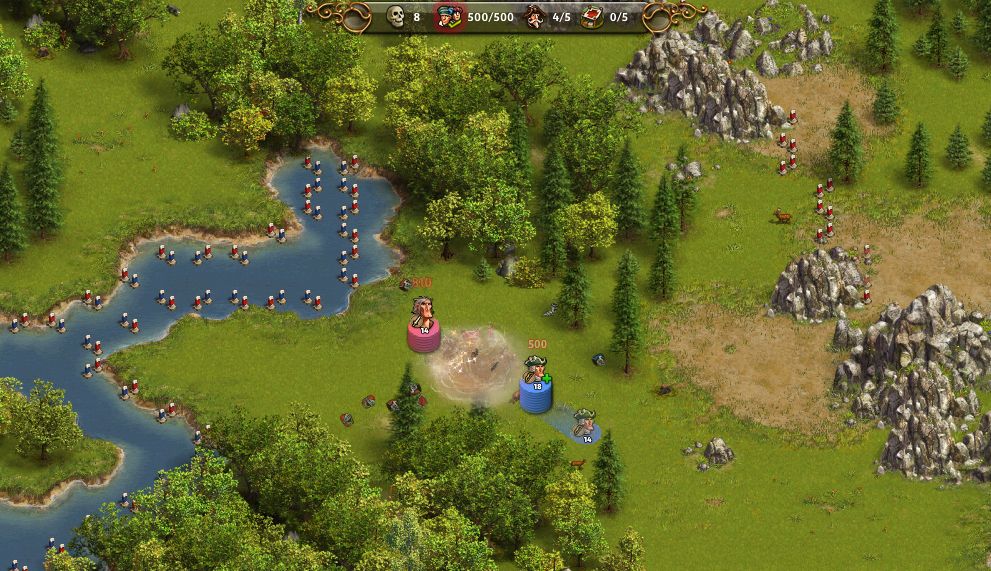
-Bring 200 Attack Archers, 150 Attack Infantry and 150 Attack Cavalry, and 5 Expedition Medipacks in case you will need them. Here's the map to start. Notice that here you can skip those 2 leaders at the very top and camp 1 will intercept your way to the Boss Castle so you can either block camp 1 or attack it. Let's attack it this time.
Camp 1 has 40 melees as indicated by the little sword. Using the PVP's combat principle: Melee beats Cavalry, Cavalry beats Archers, Archers beat Melee, you want to ensure your attacks are always giving you the best advantage so in this case, Archers beat Melees so you can send 40 Archers against the 40 Melees. Archers have 35% bonus against melees so you could send 35% less. Let's just send the 40:
You will notice that your Archers are winning because the numbers are red on the melee side:
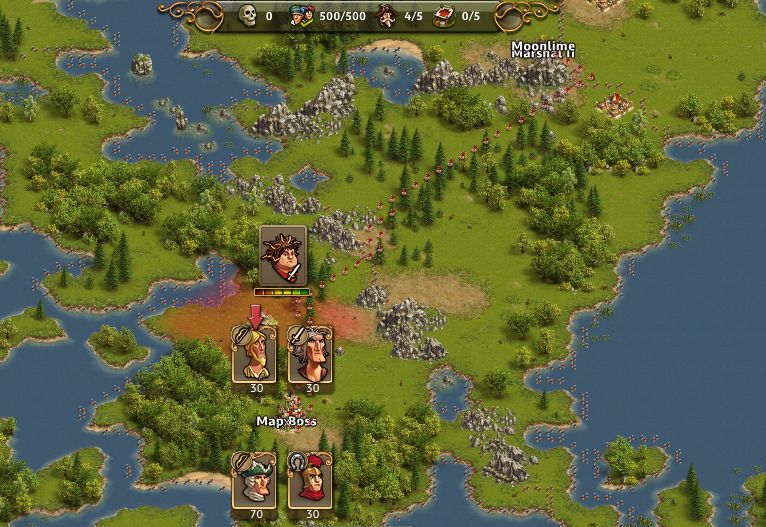
Now you can defeat the Boss camp. This camp has 30 Rangers (see bow picture on the side), 30 melees (see sword picture on the side) and a melee boss. Using the PVP's combat principle: Melee beats Cavalry, Cavalry beats Archers, Archers beat Melee, you want to ensure your attacks are always giving you the best advantage so in this case, Cavalry beats Archers so you can send 30 Cavalry against the 30 rangers , then Archers beat Melees so you can send 70 Archers to beat the 30 Melees and the boss Melee:
You might need to switch troops to ensure you have the upper hand so be sure to watch the fight. Line up the next army to fight the next enemy coming up. They could change quickly:
You may also experiment with blocks by following the PVP Step-by-Step Tutorial by Zami. You may be able to improve the PVP troop losses by using the PVP Calculator shown on Zami's step-by-step tutorial video.
Have fun!

 Reply With Quote


